
# Sprinboot之Redis集中式缓存
如何在Spring Boot的缓存支持中使用Redis实现数据缓存。
# pom.xml中增加相关依赖
        <!-- redis -->
        <dependency>
            <groupId>org.springframework.boot</groupId>
            <artifactId>spring-boot-starter-data-redis</artifactId>
        </dependency>

        <dependency>
            <groupId>org.apache.commons</groupId>
            <artifactId>commons-pool2</artifactId>
        </dependency>
        <!-- redis end-->
1
2
3
4
5
6
7
8
9
10
11
2
3
4
5
6
7
8
9
10
11
- 注意
在
Spring Boot 1.x的早期版本中,该依赖的名称为spring-boot-starter-redis
# 配置文件中增加配置信息
  #Redis 配置
  redis:
    host: localhost
    port: 6379
    lettuce:
      pool:
        max-idle: 8
        max-active: 8
        max-wait: -1ms
        min-idle: 0
1
2
3
4
5
6
7
8
9
10
2
3
4
5
6
7
8
9
10
- 参数说明
- max-idle 最大空闲连接数
- min-idle 最小空闲连接数
- max-wait 等待可用连接的最大时间,负数为不限制
- max-active 最大活跃连接数,负数为不限制
关于连接池的配置,注意几点:
- Redis的连接池配置在1.x版本中前缀为spring.redis.pool与Spring Boot 2.x有所不同。
- 在1.x版本中采用jedis作为连接池,而在2.x版本中采用了lettuce作为连接池
# User实体的定义
@Entity
@Data
@Table(name = "test_user")
@NoArgsConstructor
public class User implements Serializable {

    @Id
    @GeneratedValue
    @Column(name = "id")
    private Long id;

    @Column(name = "name")
    private String name;

    @Column(name = "age")
    private Integer age;

    public User(String name, Integer age) {
        this.name = name;
        this.age = age;
    }
}
1
2
3
4
5
6
7
8
9
10
11
12
13
14
15
16
17
18
19
20
21
22
2
3
4
5
6
7
8
9
10
11
12
13
14
15
16
17
18
19
20
21
22
# User实体的数据访问实现
@CacheConfig(cacheNames = "users")
public interface UserRepository extends JpaRepository<User, Long> {

    @Cacheable
    ArrayList<User> findByName(String name);

}
1
2
3
4
5
6
7
2
3
4
5
6
7
# User测试Controller
@PostMapping("/useRdeis")
public void useRdeis (){
System.out.println("CacheManager type : " + cacheManager.getClass());
// 创建1条记录
userRepository.save(new User("ABC", 10));
ArrayList<User> userArrayList = userRepository.findByName("ABC");
//JsonRedisTemplate.opsForValue().set("usersInfo",userArrayList);
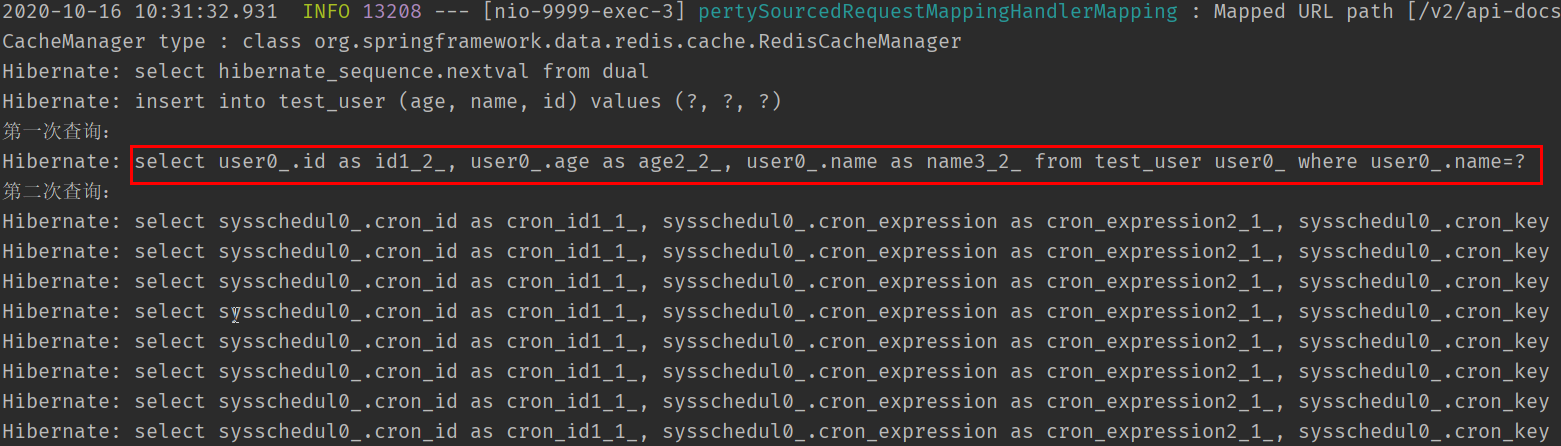
System.out.println("第一次查询:" );
ArrayList<User> userArrayList1 = userRepository.findByName("ABC");
System.out.println("第二次查询:");
}
1
2
3
4
5
6
7
8
9
10
11
12
13
14
15
2
3
4
5
6
7
8
9
10
11
12
13
14
15
# 接口测试
curl -X POST "http://10.172.96.135:9999/test/v1/useRdeis" -H "accept: */*"
1
- 控制台输出
数据库查询只执行了一次,第二次则是从缓存中取数据
- Redis Desktop Manager客户端连接并查看缓存数据

至此,Sprinboot使用Redis集中式缓存整合成功!
本文由博客群发一文多发等运营工具平台 OpenWrite (opens new window) 发布